There’s something incredibly satisfying about a walk-in chicken coop. Not just because you can stand up straight while collecting eggs (a miracle, honestly), but because it makes everything from cleaning to chicken chats feel a whole lot easier.
If you’ve got the space for it—even just a few extra feet—building or converting to a walk-in coop can seriously upgrade your backyard setup. It’s a total win for comfort, function, and keeping the whole flock happier (including the human members). Whether you’re starting from scratch, converting a shed, or adding a walk-in area to your current coop, here are a few ideas and layout tips to help you plan something that’s big, tidy, and totally doable. These ideas and plans are meant for inspiration and to help you create your own plans, rather than an exact blueprint to follow.
Think About the Size You Actually Need
Before you start measuring and pricing out lumber, figure out how much space your hens really need. The general rule is about 3–4 square feet per chicken inside the coop, and even more in the run. But when you’re building a walk-in, you’ll want to factor in your space too.
If you want room to move around, sweep, collect eggs, or even hang a feed bucket or tools, go for a height of at least 6 feet and a footprint of 6×8 or bigger. That gives you space for about 6–8 chickens, plus a bit of elbow room. If you’re converting a small shed or lean-to, just make sure you’ve got enough vertical height so you’re not hunched over all the time.
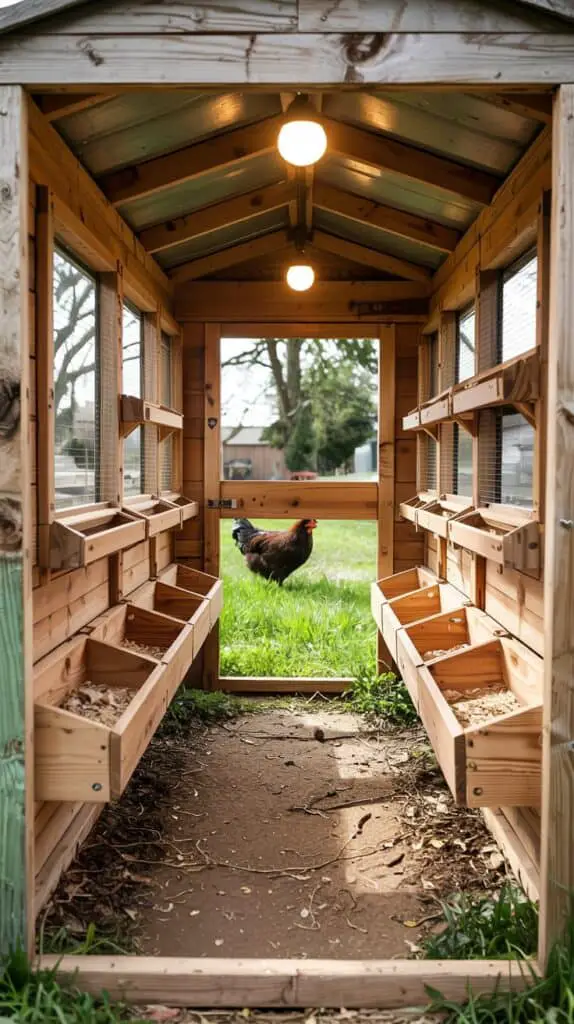
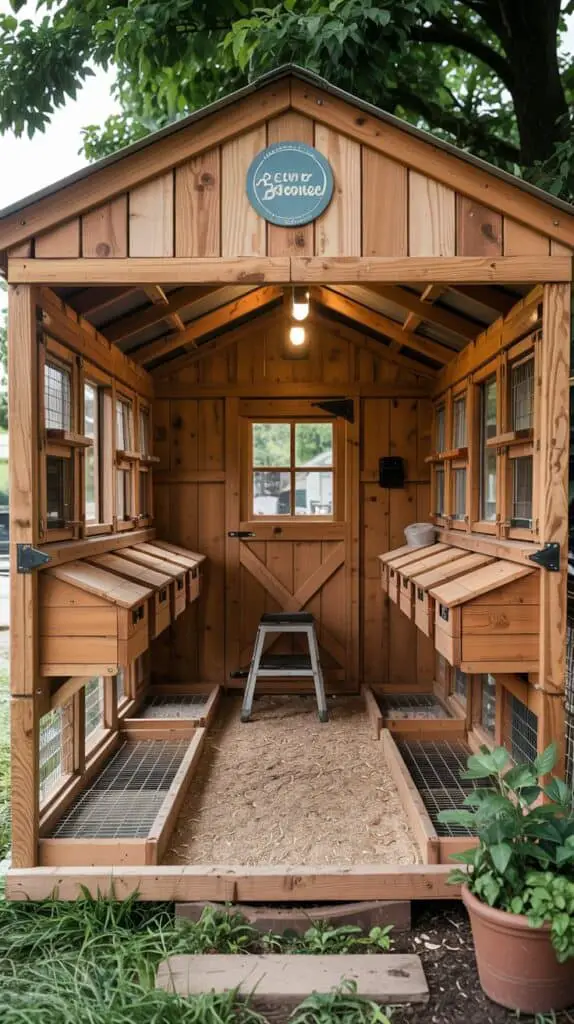
Layout the Interior for Easy Cleaning and Egg Collecting
This is where walk-in coops really shine. You can mount nesting boxes at waist height to make collecting eggs super easy. Line them up along one wall—preferably the wall closest to your path or gate—and keep them slightly lower than your roosts to avoid messy habits.
Roosting bars should be higher up and set away from the nest boxes to keep things clean. Install a poop board underneath the roosts (just a simple wooden shelf with litter) to make morning cleanups faster. You can also keep feed and water inside, especially if your yard tends to flood or freeze, but make sure it’s not too close to the roosts (nobody wants poop in their breakfast).
And don’t forget ventilation! Walk-ins need airflow up high—windows or screened vents at the top of the walls will help keep things dry without making it drafty.
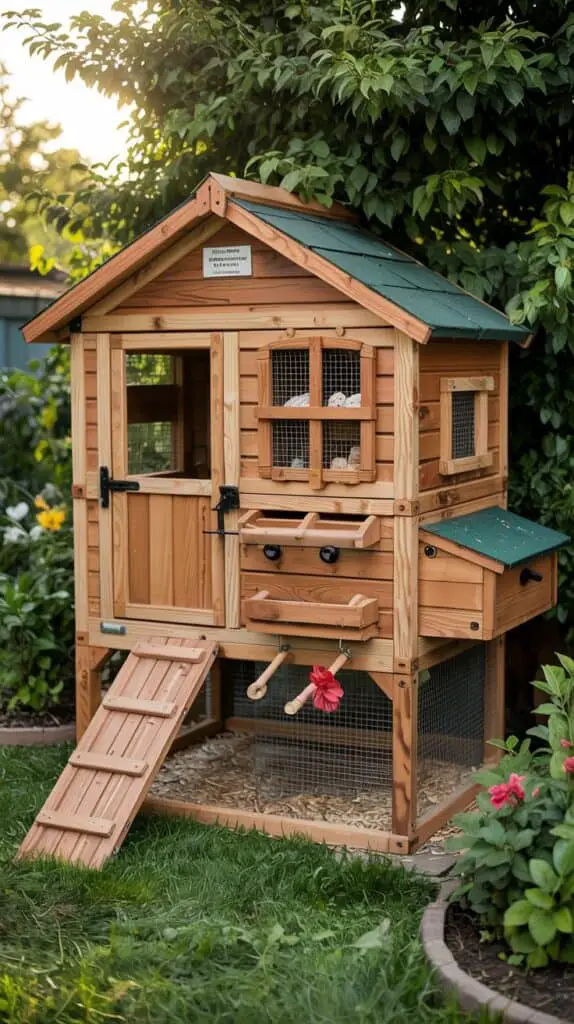
Use Doors, Fencing, and Paths That Work for Your Routine
If you’re going to walk into this coop regularly (which you will), you’ll want doors that open wide and don’t get blocked by mud, bedding, or runaway chickens. A standard shed-style door works great. Add a secure latch and consider a second smaller hatch just for the chickens, with a ramp that leads into the run.
For fencing, hardware cloth is much sturdier than chicken wire and better for keeping out raccoons and foxes. If you’re attaching a run, think about how you’ll walk between the coop and the house—add a gravel or paver path so you’re not sloshing through the grass in winter.
You can even design the run with a small walk-in gate too, so you can get in there with a rake or food bucket without squeezing through a tiny door.
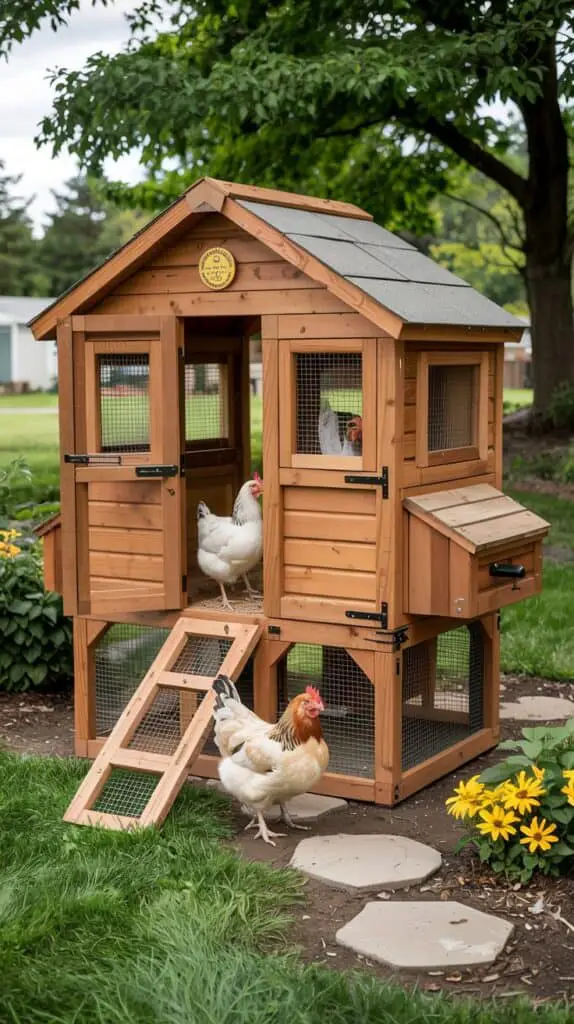
Make It Look Like It Belongs in Your Garden
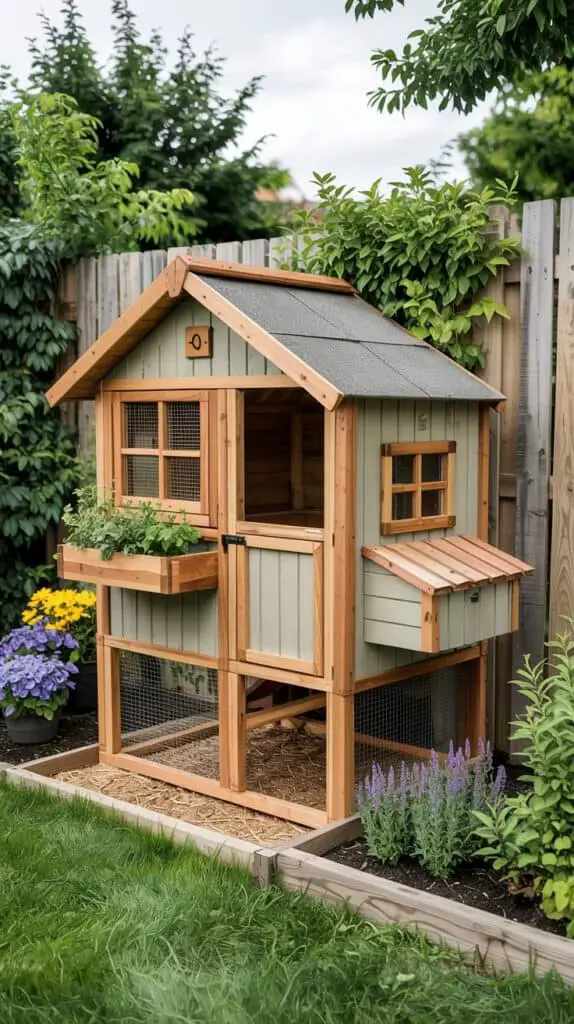
A walk-in chicken coop doesn’t have to look like a barn landed in your backyard. With a few thoughtful choices, it can blend right into your garden. Use timber cladding that matches your fence or shed, paint it in a soft neutral tone (like sage, cream, or warm grey), and plant herbs or low shrubs around the outside.
Add a planter box under a window or hang tools on the side. You can even give it a cottage-style roof or add a porch overhang for rainy-day egg collection.
It doesn’t have to be fancy—it just has to feel like it’s yours. Something that works for your family, your space, and your not-so-little flock. And when you finally step inside that clean, airy walk-in coop with eggs in one hand and coffee in the other—you’ll wonder why you didn’t do it sooner.
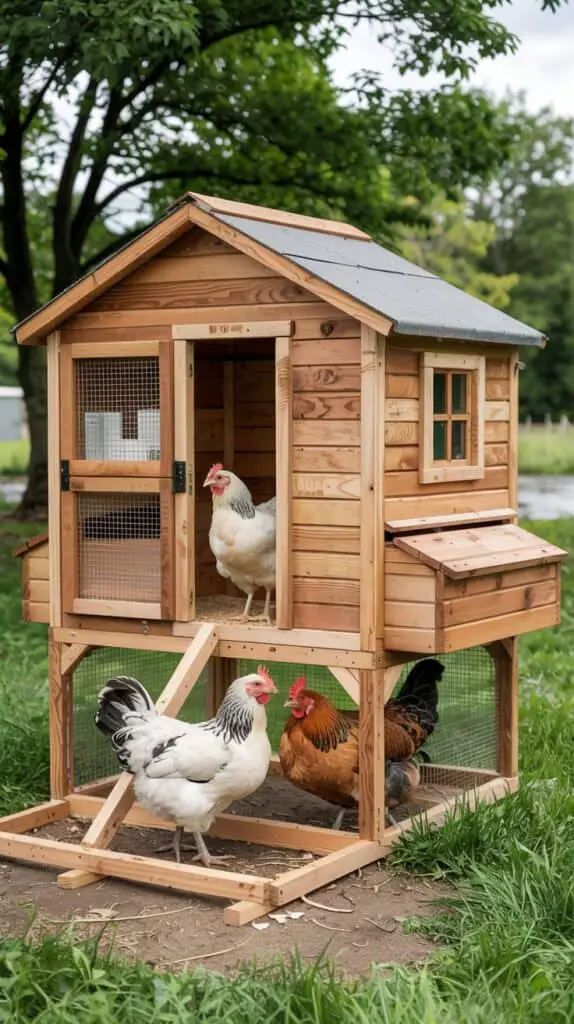
Walk-In Coop Layout for Small Yards (4–6 Hens)
Perfect for beginners or smaller gardens, this plan keeps everything tight but functional. Think 4×6 feet or 6×8 feet if you can stretch it. Place 2–3 nesting boxes along the short wall near the door for easy egg collecting, and mount a roosting bar diagonally on the opposite side with a removable poop board underneath.
Water and feed can go under the roosts (just not directly under) or in the run to save space. Use the rest of the floor for bedding and access. A small attached run can go along one side with a chicken-sized door and ramp.
This setup works well if your coop is converted from a small shed or lean-to, and it’s easy to keep clean with one-person access.
Mid-Size Walk-In Layout With Inside Feed & Storage (6–10 Hens)
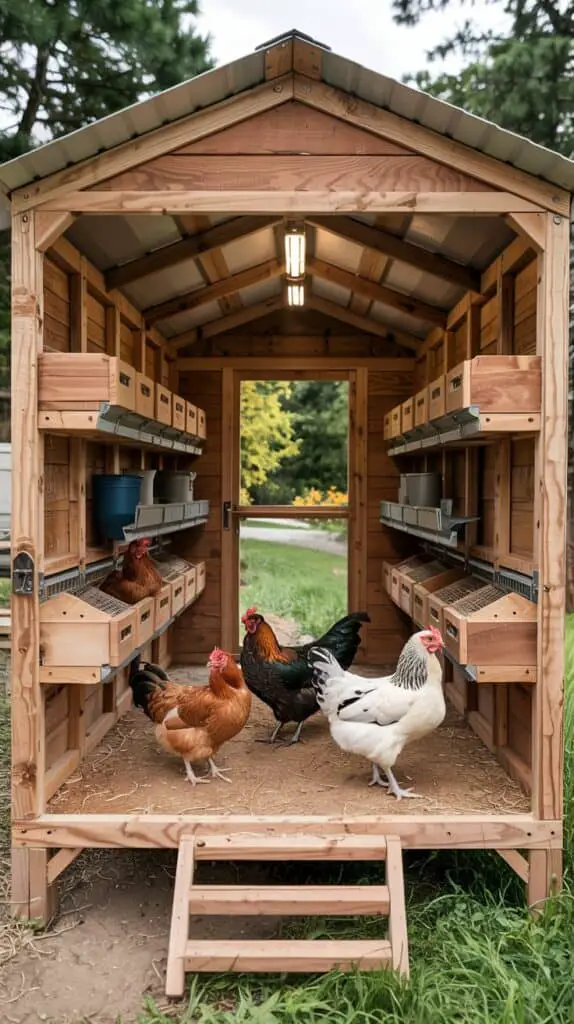
If you’ve got a bit more room—say an 8×10 or 8×12 space—you can add some major convenience. Nesting boxes along one full side wall, a central roosting bar running front to back, and a feed/water zone near the door makes this layout super functional.
You can add a wall-mounted shelf or bin storage along the back wall for supplies, scoops, and grit. Keep a people-sized access door and a separate lower hatch for chicken access to a covered run.
This layout feels more like a chicken “room” and works great for year-round care without stepping into the run.
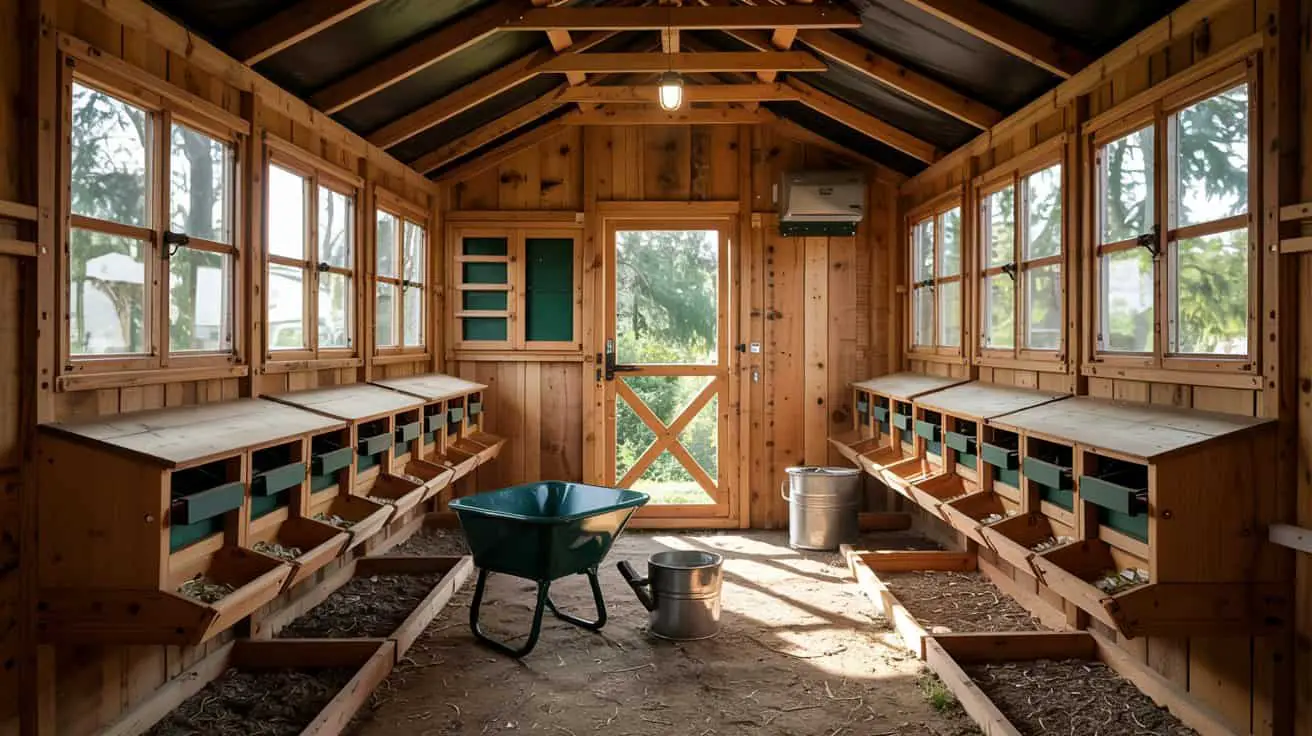
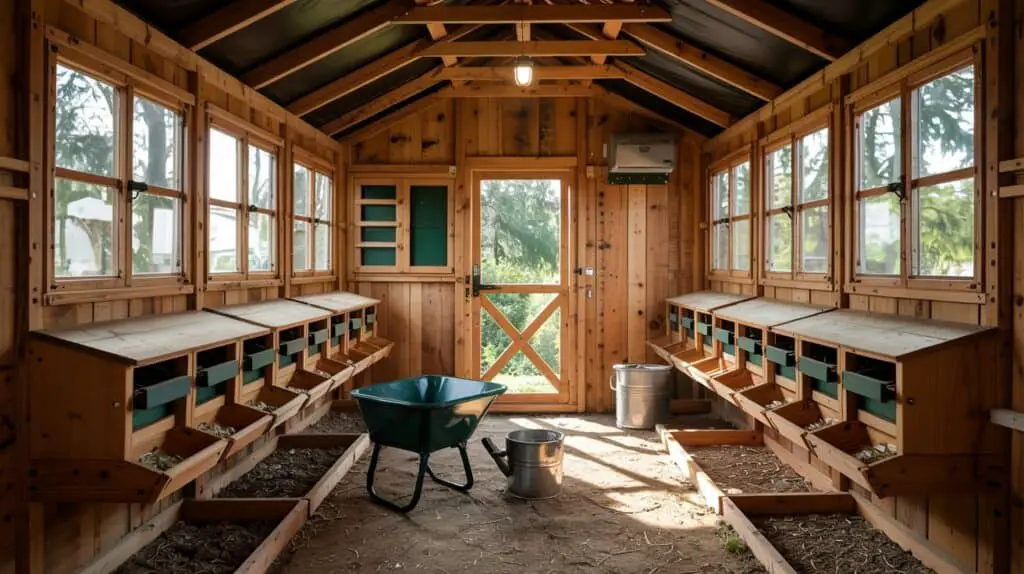
Large Walk-In Coop With Zoned Layout (10–15+ Hens)
This is ideal if you’ve got a converted garden shed or built a coop from the ground up. The space is big enough to “zone” it like a room. Nesting boxes grouped on one side, multiple staggered roost bars in a corner or U-shape along two walls, and a dedicated area for feed/water in the middle or near the door.
You can install a poop pit or sand-based litter zone under the roosts for super easy clean-up, and even keep a step stool or stool for egg collecting if the boxes are high.
This layout also lets you walk in with a wheelbarrow or full feed bucket—perfect for busy families or bigger flocks.