Let me guess—you’ve got a pile of leftover pallets, some curious chickens eyeballing your raised beds, and a winter forecast that’s looking… grim. Sound about right?
A few years ago, I was exactly there. We wanted a proper chicken run that wouldn’t blow away in the wind or look like a garage sale exploded in the garden. But we also didn’t want to spend hundreds on something that would just rot or collapse. So we built it. With pallets. And it’s honestly one of the best DIY projects we’ve ever done.
In this guide, I’ll walk you through how to build a pallet chicken run that’s affordable, sturdy, and warm enough to keep your hens cozy all winter. Whether you’re new to chickens or just upgrading from a temporary setup, this approach works in urban yards, garden corners, or rural patches alike.
And if your chickens are anything like ours—dramatic, slightly spoiled, and very vocal about drafts—they’ll appreciate the extra effort.
1. Start With the Right Pallets (and Know What to Avoid)
Not all pallets are chicken-friendly. Look for heat-treated (HT) pallets, not chemically treated ones (which are marked with MB—avoid those). Most places like hardware stores or garden centers will give them away for free if you ask nicely.
Make sure your pallets are:
- Untreated wood (safe for animals)
- Relatively clean and free of oil or paint
- Matching-ish in size so your walls don’t end up wonky
If you’re planning to build both the chicken coop and the run from pallets, grab extras—you’ll need some whole, some disassembled.
2. Map Out the Chicken Yard First
Before hammering anything together, decide how much space you want your run to cover. A good rule of thumb is 8–10 square feet per chicken in the run, plus more if they won’t free-range during the day.
If you’re working in a small garden or narrow side yard, go rectangular. If you’ve got a bigger backyard, consider an L-shape that wraps around a coop or shed.
This is where chicken yard ideas come into play. Think about:
- Drainage (you don’t want puddles)
- Wind direction (so you can add windbreaks)
- Sun exposure (great in winter, less ideal in summer)
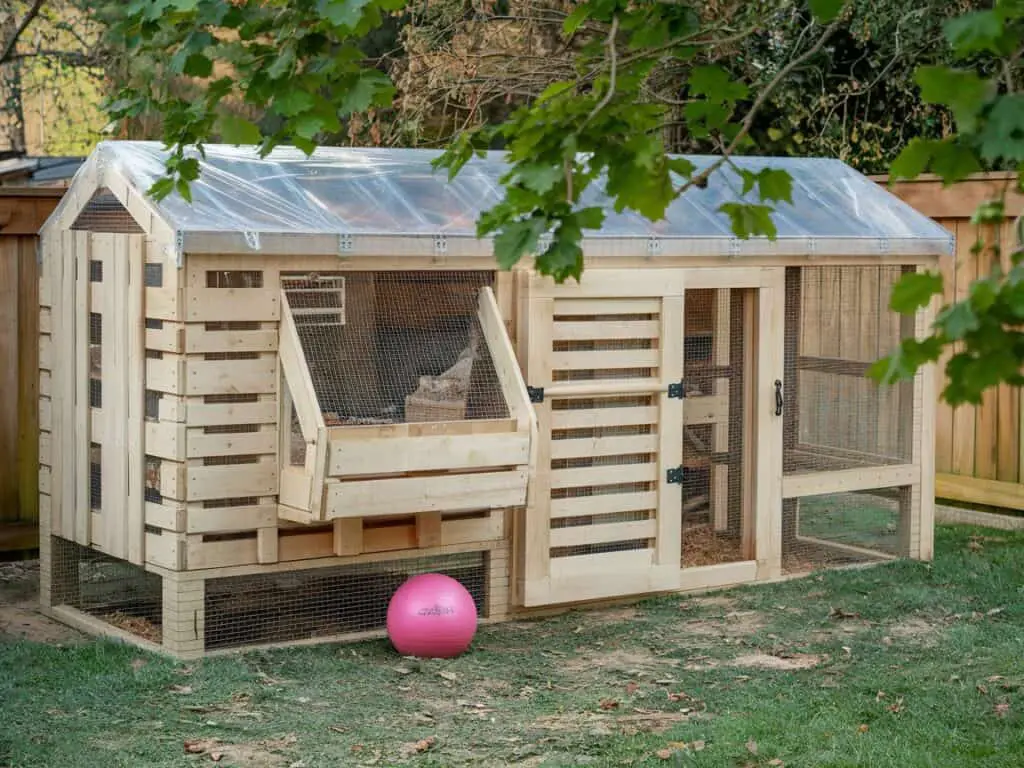
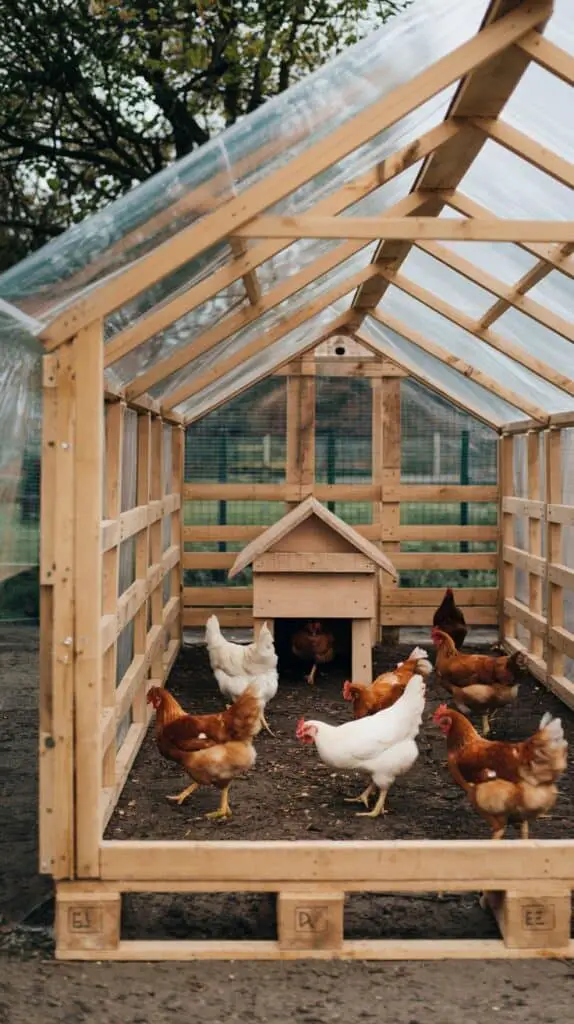
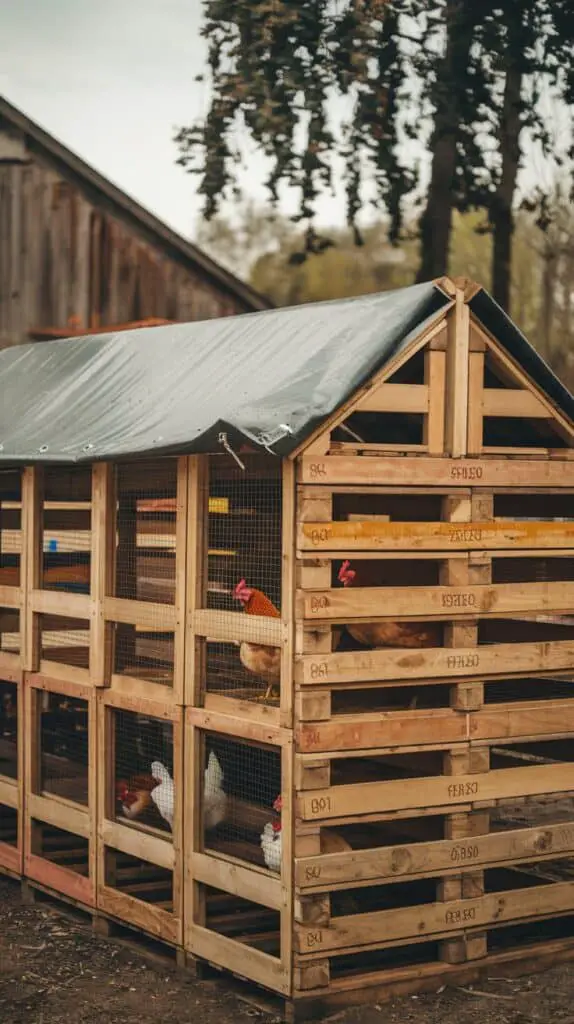
3. Building the Run Frame From Pallets
Now for the fun part—building your DIY chicken run cheap and solid.
You’ll want upright pallets as the walls, secured together either with:
- Wood screws and corner braces
- 2×4 framing along the top and bottom
- T-posts or wooden stakes driven into the ground
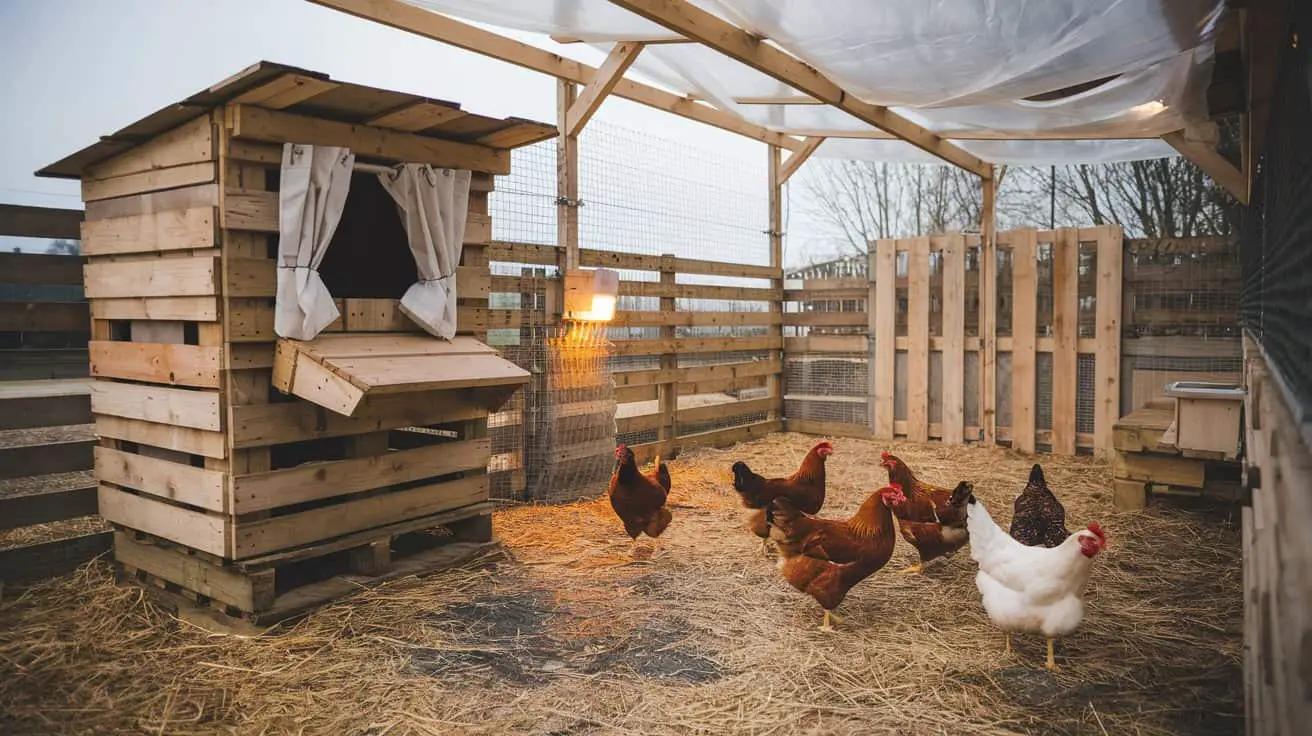
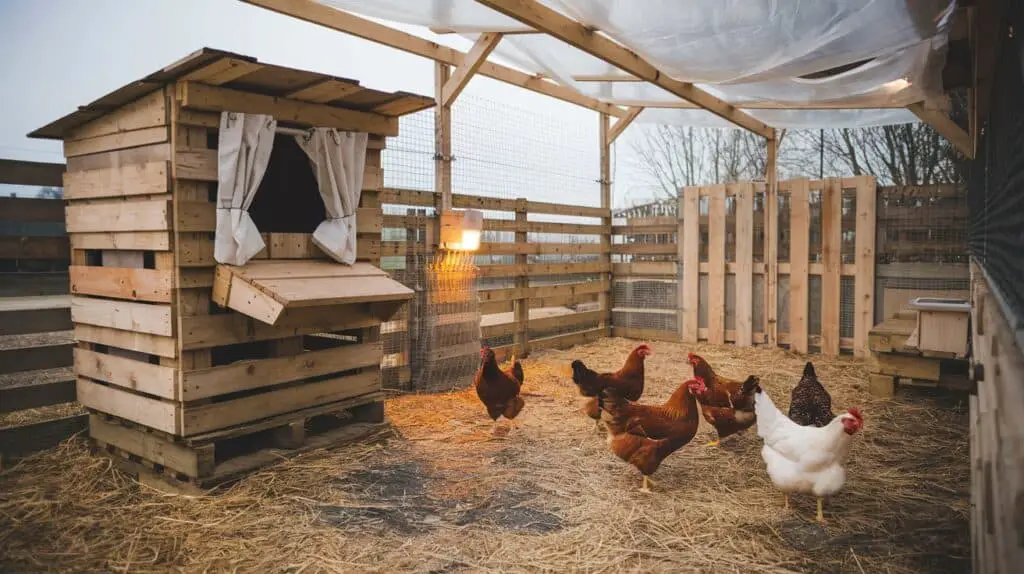
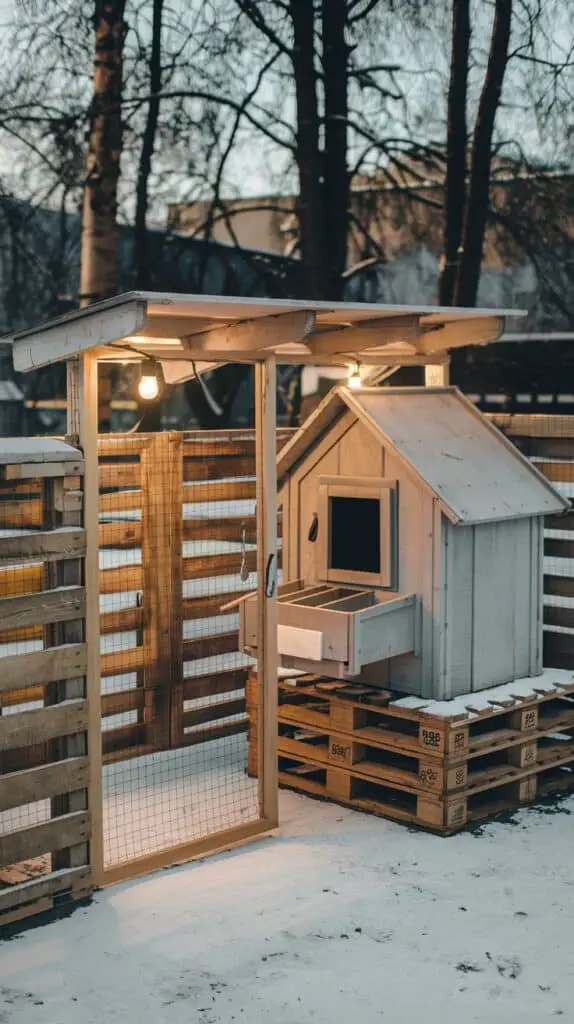
Line the inside of the pallet walls with hardware cloth (not chicken wire—it’s too flimsy and won’t stop predators). Staple it tightly, then trim any sharp edges. If you’re feeling fancy, you can sand or stain the pallets to make them look more polished.
Add a wooden or salvaged gate for access—bonus points if you attach a latch that even your cleverest hen can’t open.
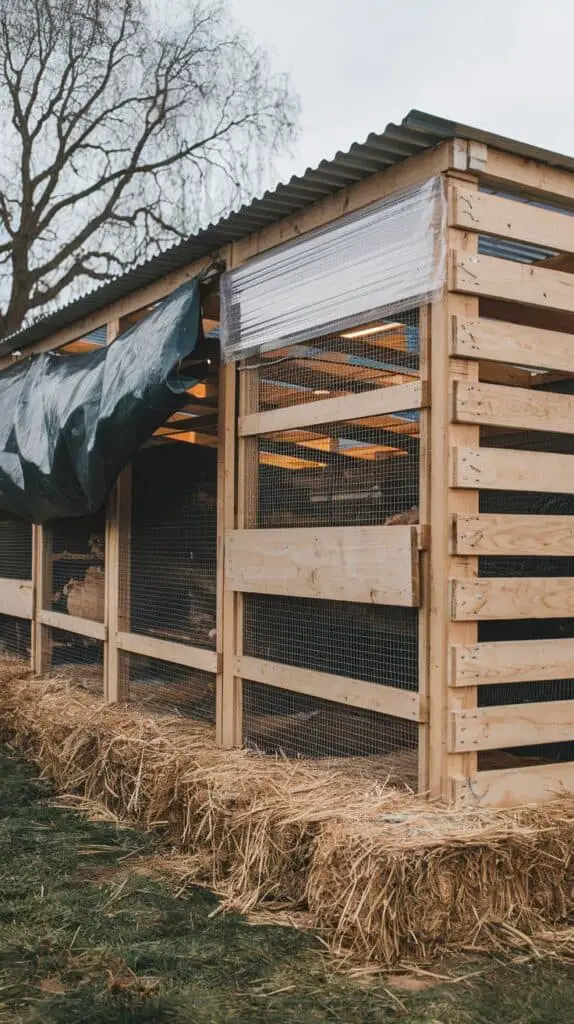
4. Make It Winter-Proof With Covers and Windbreaks
Chickens are pretty hardy—but wind, rain, and snow? Not their favourite. To make your pallet run cold-weather ready, add a few simple upgrades:
- A slanted roof made from corrugated plastic or clear polycarbonate panels
- A tarp or thick canvas over part of the run for rain/snow protection
- Pallet walls lined with plywood or scrap wood on the wind-facing side
- Straw bales along the outside base for insulation and draft protection
These tweaks help create a semi-enclosed zone where your hens can scratch, dust-bathe, and complain loudly without freezing.
Even better, the chicken run ideas DIY style means you can add or remove panels as the weather changes. It’s not fancy—but it works.
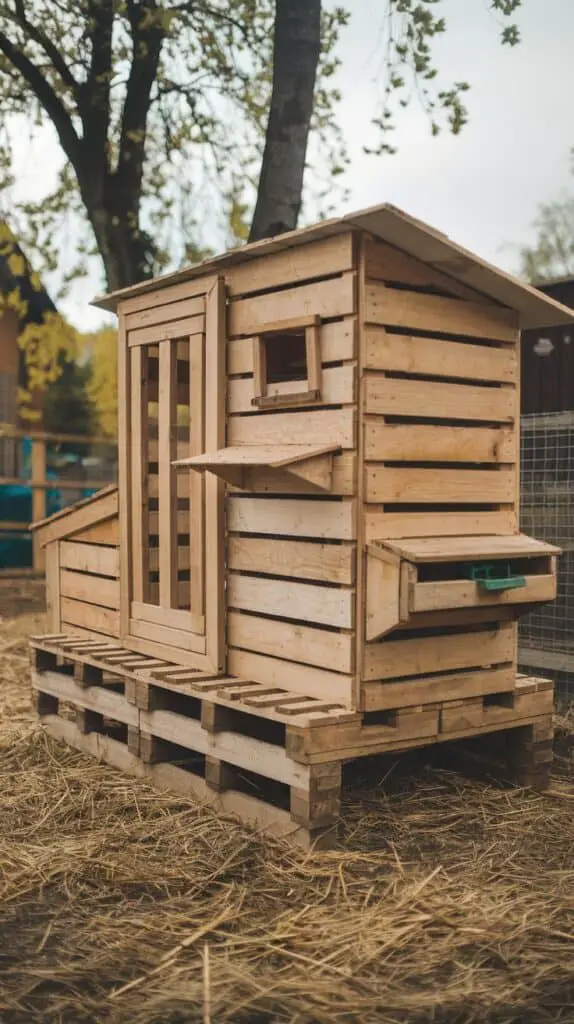
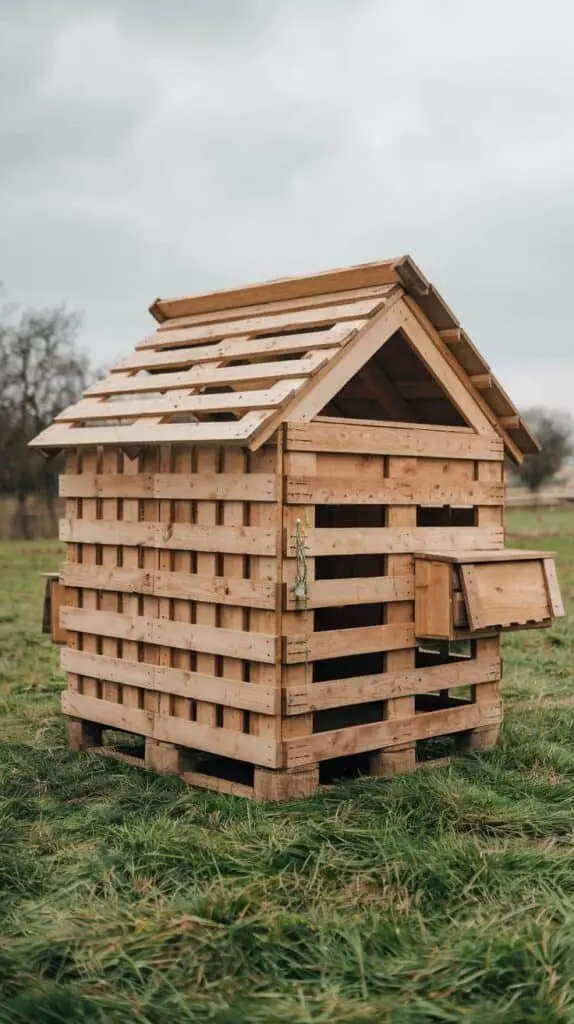
5. Attach or Add a Coop Made from Pallets
Now, you can build your pallet chicken coop DIY easy from the same material—no need to switch to store-bought lumber.
A simple box design works fine:
- Use full pallets for walls and the floor (raise it off the ground!)
- Add plywood or reclaimed siding for a sloped roof
- Include at least one small window for light
- Cut a secure pop door into the side that leads to the run
- Use a salvaged wooden door or build a basic framed one for human access
Inside, keep it simple but warm. Add nesting boxes made from buckets or crates, perches from branches or dowels, and plenty of bedding like straw or pine shavings.
Make sure it’s dry, draft-free, and ventilated (not sealed up tight—chickens need airflow even in winter).
6. Add Seasonal Extras That Make Life Easier
Once your pallet chicken run and coop are built, you can add small upgrades over time:
- Hang curtains over the coop entrance to block wind
- Add removable plastic sheeting to the run in storms
- Use old rubber mats or sand in high-traffic muddy zones
- Install solar lights or a motion-sensor lantern for nighttime visits
- Build a small feed station roofed with pallet wood to keep food dry
Final Thoughts
A pallet chicken run isn’t just a cheap fix—it’s a smart one. It recycles materials, adapts to your yard, and with a few seasonal tweaks, it holds up beautifully through winter.
You don’t need power tools, a design degree, or £500 in lumber. Just a few pallets, a free weekend, and a bit of stubborn energy (plus maybe some tea). Your hens will stay warm, your wallet will stay intact, and honestly? Your backyard might look better than ever.
And hey, if your neighbours ask who built that tidy little chicken yard? Just smile and say, “Oh, it’s nothing—just a few pallets I had lying around.”